

Hi everyone ! New school year and new planner ! Starting a new year is always full of good ideas and this time I want to plan everything in a nice planner that came some days ago to my home , at last !
I have used again one my loved hexagons dies and I love it !!

Supplies
658317
658318
657900
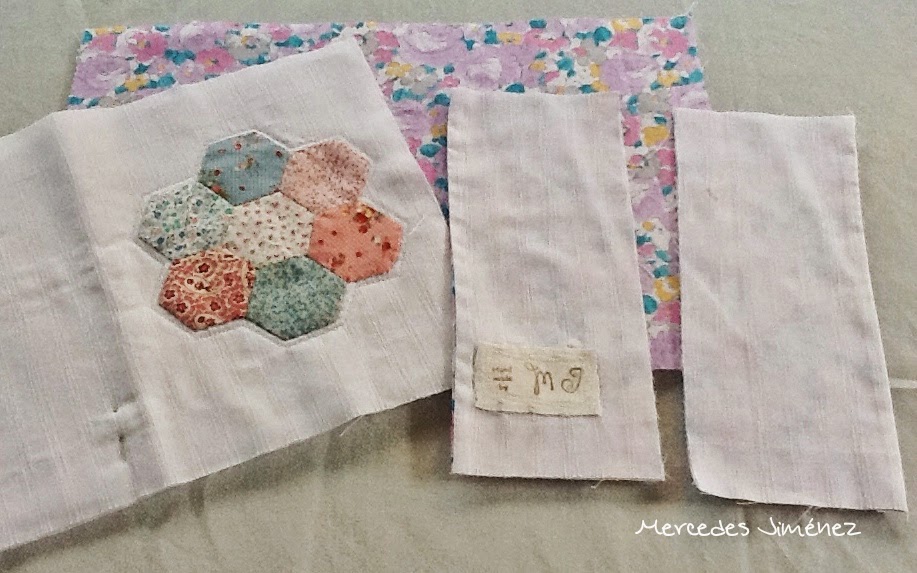
15"x10" White fabric for the top
15"x 10" batting
15"x10" lining fabric
4.5"x 10" white fabric ( two pieces ) for the flaps
4.5"x 10" lining fabric ( two pieces )for the flaps
Scraps for the hexagons
2 pieces of pompom ribbon , 11" long
a cute charm ( mine it is a bird cage )
This project is very easy. Just cut the hexagons , sew them doing a flower and applique to the white fabric as I did with my wool bag . I sew by hand.
Lay the batting in the wrong side and do some quilting around the flower .

Sew the flaps now. White and lining fabric ,right side together, just in one long side and let free.
Lay both flaps on the lining and pin. Now do the same with the quilted top. Always right side together.
Pin the pompom ribbon on the out borders. Sew around and let something open.

Now just turn out through the little open side .

Finish by hand with hidden stitches and press .
Now sew the charm.


This is my second fabric cover tuto. You can see the first one here . The flaps are sew in different way here.
Now I can enjoy a lovely cover and keep my new planner from Mr. Wonderful really great all year long.

Hope you have a wonderful weekend!!!
Love
Mercedes
................................................................................*********************** ..................................................................
¡ Hola a todo el mundo ! ¡Nuevo curso ,
nueva agenda! Empezarlo siempre trae buenas ideas y esta vez quiero tenerlo
todo bien organizado con una bonita agenda que llegó hace unos días a casa ¡ al
fin !
He usado de nuevo
mis queridos troqueles de hexágonos y me encanta.
Materiales
658317
658318
657900
38cm x 25.5 cm de
tela blanca para el top
38cm x 25.5 cm de
guata
38cm x 25.5 cm de
tela para el forro
11.5 cm x 25.5 cm
de tela blanca ( dos piezas ) para las solapas
11.5 cm x 25.5 cm
de tela para el forro ( dos piezas ) para las solapas
Restos de telas
para los hexágonos.
2 trozos de cinta
de pompones de 28 cm cada una
Un adorno metálico
( el mío es de una jaulita de pájaro )
Este proyecto es
muy fácil . Sólo tienes que cortar los hexágonos , montarlos , como hice en la bolsa para las lanas , y coserlos haciendo una flor. Aplícalos a la tela blanca. Yo
los cosí a mano.
Coloca la guata
por el revés y haz algo de acolchado alrededor de la flor.
Cose las solapas
ahora. La tela blanca y la de forro por el lado del revés de cada una ,solo por
un lado , dejando tres libres.
Pon las solapas en
los extremos con los lados no cosidos hacia afuera y sujeta con alfileres. Has
lo mismo con el top colocando también el lado derecho con el dercho. Sujeta con
alfileres las tiras de pompones en los extremos y cose alrededor dejando
una pequeña parte sin coser.
Ahora sól tienes
que dar la vuelta por el pequeño hueco
abierto.
Termina a mano con
puntadas escondidas y plancha.
Por ultimo cose el
adorno.
Éste es mi segundo
tuto para hacer una funda. Puedes
ver el primero aquí. Las solapas
están cosidas de diferente manera.
Ya puedo disfrutar de una bonita funda para mi nueva agenda de Mr. Wonderful durante todo el año.
Que tengas un maravilloso fin de semana
Cariños
Mercedes
No comments:
Post a Comment