Friday 31 January 2014

My Valentine's Style


Hi again friends! 

It's really cold outside - but here, on my desk I already started thinking about projects for St. Valentine's Day! I'm not a huge fan of hearts or butterflies - but I do love creating something unique for people I love. Mixing styles and using a lot of metal embellishments is my trademark - but this time I was trying to create "mechanical-botanical" look on my greeting card. I'm sure this mixture of elegant and industrial, a bit more "masculine" look will be perfect for those of you who want to give something special to your boyfriends, husbands, brothers or fathers.

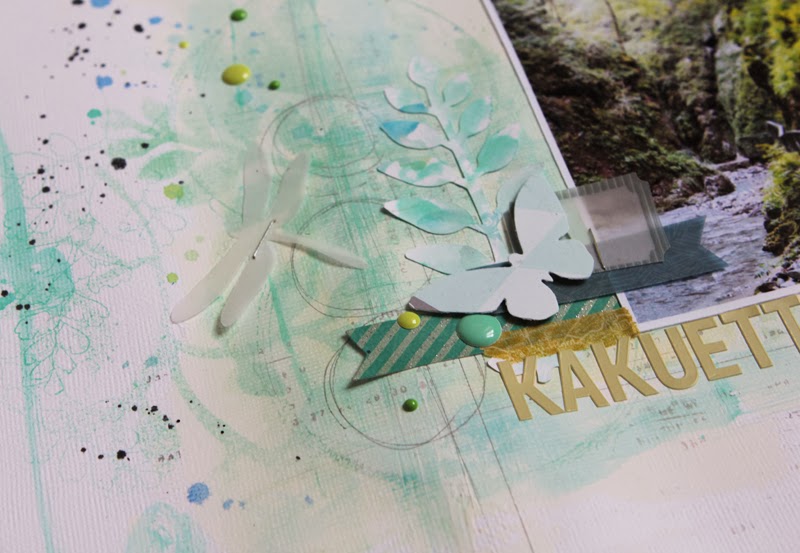
Everything is non-traditional here - color palette (mostly greens, golds, creams and metallic colors), layering and embellishments layered on tons of paper and paper cut-outs. There are doilies and "medallions" which i love and use constantly to create the 3D look on my projects, but also more masculine elements: "Picture Wheel" from Tim Holtz and really beautiful - and neutral - leaves from his collection.
All this was glued with craft glue, hot glue and a lot of 3D foams to create even more dimension.
I hope you will like my idea!

Here are the dies I used to create this project:
- 659436 - Sizzix Bigz Die-Garden Greens


I wish you all a great, creative week! Maybe it is the best moment to create something for your loved ones?
Finn

Fun & Faboulus Valentine


Hi Sizzix fans! It's Anna posting today.
I'm showing you a card, very very easy to make and so lovely! Valentine is around the corner and what’s the best way to show love and appreciation to your loved ones? Sending Valentine Cards!
Sizzix have got just the thing for all your cardmaking needs: 8 free downloadable papers! The sentiment is included on the free papers, you have an option of cutting it out as a rectangle or to die cut it.
This is my card:
 
Anna Draicchio cafe creativo - sizzix big shot - valentiner card - paper free
 
To make this card I cut out an acetate heart using Sizzix Bigz Die - Hearts, True Affections and I cut out a doily from white cardstock using Sizzix Bigz Die - Doily, Classical Lace. So I printed the papers & embellishments to build up my design.
To add a bit of extra interest I added a wood embellishment. I topped it all off by adding some sequins and stitching.
Put something down and add more stuff! Well...I think they turned out pretty cute!
 
Anna Draicchio cafe creativo - sizzix big shot - valentiner card - paper free 2
 
Items used:
white cardstock
patterned paper: 8 free downloadable papers by Sizzix, acetate paper (Hambly)
wood embellishment (Studio Calico)
sequins
sewing machine and yarn
 
See, it's super easy to make a Valentine card whit Sizzix!
Thanks for stopping by and till next time happy crafting!!!
 
**************************************
Flag_of_Italy Per le amiche italiane! :)

Ciao a tutte le fans di Sizzix! Ecco un nuovo appuntamento con Anna.

Oggi vi mostro una card, molto facile da fare e così carina!
San Valentino è dietro l'angolo e qual è il modo migliore per mostrare amore ed affetto ai vostri cari? Regalare un biglietto fatto a mano!
Sizzix ha pensato di farvi cosa gradita rendendo disponibili gratuitamente ben 8 carte stampabili per San Valentino! Io le ho usate subito! Non sono deliziose???

Per fare questa card ho ritagliato un Cuore in acetato con Sizzix Bigz Die - Hearts, True Affections e un Centrino con Sizzix Bigz Die - Doily, Classical Lace. Ho poi stampato le carte ed ho ritagliato alcuni pezzi (compresa la pagina con scritte ed abbellimenti) per costruire il mio schema.
Per aggiungere un po' di rilievo ho inserito un abbellimento di legno ed ho completato il tutto con alcune paillettes e cuciture. Insomma, basta sovrapporre e mettere giù qualcosa e la card si crea quasi da sè!
All'interno potete inserire un biglietto per il cinema o per uno spettacolo, così da regalare una bella sorpresa ;)

Grazie per essere passati di qui! Spero che questo post vi abbia ispirato per creare biglietti da regalare a mariti, compagni, fidanzati.
A presto con nuove idee!
 
Materiali:
Sizzix Big Shot Machine (657900)
Sizzix Bigz Die - Hearts, True Affections (658923)
Sizzix Bigz Die - Doily, Classical Lace (658922)
cartoncino bianco
carte fantasia: 8 carte stampabili gratis by Sizzix, foglio di acetato decorato (Hambly)
abbellimento di legno (Studio Calico)
paillettes
macchina da cucire e filo

Thursday 30 January 2014

Showing off!


I've just had an exciting, but very tiring, week in Frankfurt at Creativeworld 2014. It's the second year I've been, along with the rest of the Sizzix team to show what's new in the world of Big Shot and Bigz die cutting. 
The whole stand looked amazing - and here is a quick snapshot of the quilting and applique section.


Some of the projects you may have already seen on my blog - but as the title says - I'm showing off, just a little, and there is also a  sneak preview of some projects made with new dies that will be available in August.
This year is going to be even more fun than 2013 - with new dies and fabrics to keep us sewing to our hearts content!
Now I'm starting on some more projects ready to display at Stitches trade show in February - it's at the NEC - so almost local(!) - and I hope to see some of you there.
So that's all for this week - have fun and keep sewing.
Angela
 

Do not adjust your sets!


What a strange title for a blog post I hear you all cry! Truth is, I have spent the last week in the fair city of Frankfurt attending the Creativeworld trade fair where I took some pictures of a project that I was creating on the Craft Emotions stand for whom I was demonstrating. My phone doesn't have the best camera I'm afraid so don't go rubbing your eyes because the chances are most of the photo's are slightly blurred!

Creativeworld is a visual smorgasbord bringing together the brightest and best crafting talent from all over Europe.It was a great opportunity to meet up with old friends and make a few new ones along the way. We packed away the Sizzix stand at around Midnight last night and flew home this morning.

While at the Craft Emotions stand I had the opportunity to work with some wicked products which compliment die cutting perfectly, the team will be in Birmingham at the Stiches show in about three weeks so if you're lucky enough to be about it will be worth your while to check out some of their unique and innovative products (click on the link to check out their website).

The die that I used is the Susan's Garden Poinsettia which is a Thinlits set comprising 7 dies which we have looked at before. I also used my trusty Susan's Garden tool kit which goes everywhere with me.

I love using mulberry or silk paper because it has such a lovely texture but it is hard to shape as one would with card. I was handed rolls of adhesive silk paper on my first day at the show and this is a great solution to my problem, it allowed me to attach it to medium weight card to make my flowers.Next I die cut all the elements to make my flower which is far fewer than need to make a poinsettia, I just wanted a generic 'pretty flower', I then delicately inked the inner part of the petals.


Next I used my tools to shape the individual petals using my tool kit and some techniques you can see by following this link.


After shaping the flower centre, again using my tools, I ponched a hole through the centre to receive the pearl flower stamen ( see the Craft Emotions website), before attaching the individual petals. When the glue was dry I inserted the stamen.


I die cut a pillow box from printed Kraft card (Craft Emotions again!) and cut a strip of pink paper which I scrunched and distressed with inks before lightly sanding. I then wrapped the strip around the box,


Craft Emotions do a fab range of wooden embellishments ( I'm trying to think of a cool way to use the boxes too!) I selected 3 and inked them as shown using silver gilt wax for the butterfly, the centre of which I decorated with adhesive pearls before attaching them behind the assembled flower.


Here is the finished box in all its 'out of focus' glory. I guess I'll never win any photography prizes?


Here are a couple of other cards created during the show. top left features the poinsettia with some added foliage courtesy of the new Spring Greenery Decorative Strip die by Tim Holtz. the card top left again features the poinsettia  but with pink ink replacing the green and finally, the complete poinsettia in all its glory.


Go Green Layout


Hello!

Today I’ll show you an all-in-green page to celebrate Mother Nature. I used two sets of dies that were just perfect for my theme “Go Green”!

Supply list:

Cardstock: American Crafts
Papers: American Crafts
Alphabets: October Afternoon, Jenni Bowlin Studio
Enamel Dots: Studio Calico
Die cuts: Crate Paper
Stamps: Glitz Design, Stampin Up
Ink: Infocréa
STABILO Pen 68 pens
Others: Tracing paper, masking tape

Dies:

659436: Sizzix Bigz Die-Garden Greens
658334: Sizzix Sizzlits Dits-Flights of Fancy

This is a creation with pastel tone-on-tone colours that is highlighting a nice picture of a stroll in the mountain.
I started by applying Gesso on a white cardstock with an old loyalty card. Once my paper was dry, I had fun colouring it with watercolour pens from STABILO Pen 68.

Then I added stamped patterns printed with a tone-on-tone ink colour, and Sizzix dies.
The first foliage pattern is cut out of white paper then coloured with the watercolour pens.

The butterflies and dragonfly patterns are cut out of tracing paper. They are stapled to the background to avoid unexpected glue marks.

Finish by inserting little colourful dots and your title!


Have a lovely day !

Karine

Bonjour !

Une nouvelle page aujourd'hui toute verte pour célébrer la nature qui nous entoure. J'ai utilisé ici deux sets de dies juste parfaits pour ma thématique "Go Green" !

Matériel :

Cardstock : American Crafts
Papiers : American Crafts
Alphabets : October Afternoon, Jenni Bowlin Studio
Enabel Dots : Studio Calico
Die cuts : Crate Paper
Tampons : Glitz Design, Stampin Up
Encre : Infocréa
Feutres STABILO Pen 68
Divers : calque, masking tape

Dies utilisés :

659436: Sizzix Bigz Die-Garden Greens
658334: Sizzix Sizzlits Dits-Flights of Fancy

Une création dans les couleurs pastelles et ton sur ton pour mettre à l'honneur une belle photo de balade en montagne.
J'ai commencé par appliquer du Gesso sur mon cardstock blanc à l'aide d'une carte de fidélité.
Une fois ma surface sèche je me suis amusée à la colorer avec des feutres aquarellables de la marque STABILO Pen 68.

Mon fond est ensuite complété par des tampons imprimés avec une encre ton sur ton et des découpes Sizzix.
Le premier feuillage est découpé en blanc, il est ensuite coloré avec ces mêmes feutres aquarellables.

Les découpes papillons et libellule sont quant à elles découpées dans du papier calque. Elles sont agrafées à mon fond afin d'éviter toutes traces de colle indésirables.

Complétez ensuite avec de jolies pastilles aux couleurs assorties et votre titre !

Bonne journée à vous

Karine


Wednesday 29 January 2014

Welcome to the Fairytale


Hi All,

Daria is here. And today I would like to show you a card. I called this card "Welcome to the Fairytale". 

Items:
Big Shot Machine (657900)
Sizzix ScoreBoards XL Die - Album, Garden Gate (658449)

I created  the base of card using Album, Garden Gate die.  I colored the images and glued them onto the card. Then I decorated the card with butterflies which I cut using Butterflight die. Also I added flowers, pearls and glitter. 


Have a nice day!

Daria.

Всем привет!

Сегодня я с открыткой, которую назвала "Добро пожаловать в сказку". Я вырезала основу для этой открытки воспользовавшись ножом Album, Garden Gate. Я вырезала эту форму несколько раз, сначала из бумаги для черчения, потом из бумаги для скрапа. После склеила все слои и затонировала. 
Я раскрасила цифровые штампы и добавила их на открытку. Затем я добавила бабочек, которые вырезала с помощью ножа Butterflight. И в конце я украсила открытку цветами, жемчужинами и глиттером.

Материалы Sizzix:
Big Shot Machine (657900)

Всем хорошего дня!

Tuesday 28 January 2014

Valentine's Smash Book

Hi everyone.
I hope you all had a lovely week. Today i will show you a " Smash book " i made using the Free Download Valentine's Papers

 Items used:
Sizzix Movers & Shapers L Die - Tag & Bookplates
Sizzix Bigz Die - Heart, Stem & Leaves
Sizzix Bigz Die Phrase Love
Sizzix Bigz Die Victorian Carolers
Sizzix Movers & Shapers Magnetic Die Set 2PK - Flower & Heart
Sizzix Sizzlits Decorative Strip Die - Vintage Lace
Supply list:
Paper: Free Valentine's download papers
Ink: Archival ink -Coffee-, -Sepia-
Stamp: KaiserCraft clear stamp-YOU-, Tim Holtz -100th Collection-from Stampers Anonymous
Glossy accent, clips, and brads


Thanks for stopping by
Wish you a great week
Pia

Hej alle
Jeg håber håber du har haft en dejlig uge. I dag vil jeg vise en "Smash bog" jeg har lavet og hvor jeg har brugt de lækre Free Valentine's Download papirer
Sizzix dies jeg har brugt:
Sizzix Movers & Shapers L Die - Tag & Bookplates
Sizzix Bigz Die - Heart, Stem & Leaves
Sizzix Bigz Die Phrase Love
Sizzix Bigz Die Victorian Carolers
Sizzix Movers & Shapers Magnetic Die Set 2PK - Flower & Heart
Sizzix Sizzlits Decorative Strip Die - Vintage Lace
Andre materialer:
Papir: Free Valentine's download papers
Ink: Archival ink -Coffee-, -Sepia-
Stempler: KaiserCraft clear stamp-YOU-, Tim Holtz -100th Collection-from Stampers Anonymous
Glossy accent, clips og brads
Tak fordi du kiggede forbi
Ønsker dig en dejlig uge
Pia

Family Rules - Mini Wall Hanger


Hi everyone...today I have a mini wall hanger to show you.


Supply list:
657900 Sizzix Big Shot machine
657691 Sizzix Bigz Die - Heart, Stem & Leaves
656626 Sizzix On the Edge Die - Ornate

Papers: Pion Design - A Day in May, chipboard
Inks: Distress ink Pad - Frayed Burlap
Other: Cheesecloth, Gesso,

 
How to do:
Cut out chipboard measuring 21x13,5 cm. Die cut the edge with Sizzix On the Edge Die - Ornate
Paint the chipboard with Gesso and let it dry. Cut out two panels and distress all the edges and cheesecloth with Distress ink Pad - Frayed Burlap.
Die cut the heart, stem and leaves in patterned paper with Sizzix Bigz Die - Heart, Stem & Leaves
Print out some words you like to have on your "Family Rules". Cut out and glue it on the front.


Thanks for stopping by and I wish you a great day!
Anne Kristine

♥♥♥♥♥♥

Hei alle sammen... i dag har jeg et mini veggbilde å vise deg.

Materialer:
657900 Sizzix Big Shot machine
657691 Sizzix Bigz Die - Heart, Stem & Leaves
656626 Sizzix On the Edge Die - Ornate

Papir: Pion Design - A Day in May, chipboard
Inks: Distress ink Pad - Frayed Burlap
Annet: Osteklut, Gesso

Beskrivelse:
Skjær ut chipbard som måler 21x13,5 cm. Stans ut øverste kant med Sizzix On the Edge Die - Ornate
Mal chipboard med Gesso og la det tørke. Skjær ut to panelser i mønsterark og distress alle kantene og osteklut med Distress ink Pad - Frayed Burlap.
Stans ut hjerte, gren og blader i mønsterark med Sizzix Bigz Die - Heart, Stem & Leaves
Print ut noen ord du ønsker å ha i dine  "Familie Regler". Klipp ut og limes i front.

Takk for at du stikker innom her og jeg ønsker deg en herlig dag!
Anne Kristine

Monday 27 January 2014

Valentine's little favor box

Hi everybody!

Today I want to show you a little favor box I made using the Thinlits Square Box die set by Rachel Bright. Valentine's Day is just around the corner, so it might be handy to have some of these boxes filled with some sweets and chocolate.


Supply list:

This box is really easy to assemble, so you can make a bunch of them in minutes, and they are a great gift for teachers, friends, family or party favors. This one is filled with some chocolate, but you can put a lot of things in it. Any Suggestions?

Happy Monday!

......................

¡Hola a todos!

Hoy os quiero enseñar una cajita hecha con un el Thinlits Square Box de Rachel Bright. San Valentín está a la vuelta de la esquina, y aunque aquí no lo celebremos mucho, siempre viene bien tener algún regalito preparado por si acaso.

Esta caja es muy fácil de montar, así que podéis tener unas cuantas hechas en solo unos minutos, con lo que vienen genial para hacer regalitos para profes, amigos, familia y algún detalle para bodas u otras celebraciones. Esta en concreto tiene bombones dentro, pero se pueden poner otras muchas cosas. ¿Alguna sugerencia?

¡Feliz lunes!


safari moon 9-patches


Hello everyone! Are you ready for another week?

I had a very busy one last week, and this week looks much the same (and my email inbox is out of control - I have to spend a whole day getting on top of emails and replying to people that have been waiting on me! That is my project for the day I think)

One of the projects I'm working on involves 9-patches in one of my favourite fabric collections for a long time.

9-patches are great for using up all your odds and ends of scraps. I'm making 6" finished blocks, which need 2.5" squares.


Safari Moon by Frances Newcombe for Art Gallery Fabrics is a gorgeous mix of colours and prints, and because it's Art Gallery it has a wonderful drape and softness to it that sets it apart from other manufacturers.


Just look at that zebra!


Because I'm mixing these vibrant colours with a white solid I pre-washed them. I don't usually pre-wash fabrics unless there's a big contrast between colours. Once fabric has been washed it loses that crispness that brand new, off the bolt fabric has. I must admit, though, these fabrics washed up really nicely and still had a good 'crispness' to them after I'd ironed them.

I'm off to make a start on my emails. Wish me luck! I might not be seen for some time!


Saturday 25 January 2014

Acetate embossed card


Hello and Happy belated New Year!

Today I am sharing another technique for texture impressions folders. This one is using acetate and texture paste.

I used the Sizzix Winter Leaves folder and the acetate of the XL Bigz dies packaging - yes, I am one of those crafters that keep everything!  


I trimmed the acetate to measure 5" x  10" and folded in half. Then I embossed it placing the folder in the middle.


Using a palette knife I put the paste - I used Decoart's Modelling Paste because it is very lightweight, something to consider for this technique. Cover the whole area and using the same palette knife remove as much excess as possible.


To create the insert, I cut two pieces of paper - I used Carte Postale by Basic Grey - one to measure 3 1/2" x 3 1/2" and the darker one 4" x 4" . I glue the lighter one from the inside and then the darker one from the back. this way it hides away the adhesive.


Finally I added a sticker and button. I just love the shabby chic look! I hope you do too.