Friday 30 March 2012

Playing with textures...

 By Anna Dąbrowska


Hi again! This week I challenged myself to make areally, REALLY small project. I know it may sound funny, but I'm not confident with tiny pieces such as tags, cards or ATCs. I prefer to have more space to play and limitimg myself to only few inches is stressing. But anyway - I did it and I'm quite happy with the result: a set of 2 mixedmedia ATCs.


I wanted to play with texture... and I think Tim Holtz Decorative Strips Dies are very useful for various mixedmedia creations! For my little project I chose:


First od course I gathered all the supplies - ATC chipboards, vintage paper, the cut-out motive, some masking tape... For this project I also use a whole range of mixed-media products: Matte Mod Podge, Light Molding Paste (Golden), Glimmer Mists (Tattered Angels) and Glossy and Crackle Accents (Ranger). 


First I used Mod Podge to glue the vintage paper on my ATC cards. I dried them with heating tool.


Next, using the same medium I glued the cut-out strip (torn into smaller pieces) on one of the cards.


On the second one I created a texture with Light Molding Paste: I covered the card and die cut-out with paste and when it was still wet I removed the cut-out making a negative texture. 


I dried the project again and colored it with sprays: Glimmer Mists in shades of dark blue and green. 


Next I dried it again and filled the texture on the second card with Crackle Accents and Glossy Accents and I used Glossy Accents to stick some acrylic drops to the first one. 


I let it dry and and came later to add some finishing touches. Done!


Here is the final result. 
From the first moment they were made to be a set - and I love how they go toghether!


I hope your heads are loaded with ideas how to use Sizzix dies to create wonderful texture - Have fun with experimenting!
See you soon!
Finn
 By Angela Southey


Hello, I'm Angela , and as I'm fairly new to Sizzix I'll tell you a little about myself.  I have always loved sewing, making clothes for my dolls as a child, and progressed to making my own clothes as a teenager. I trained to teach textiles and then ran my own sewing business while raising my family. For a change of direction I began working in a shop which specialised in  fabrics for Patchwork and so a new avenue opened.


I love patchwork - the creativity, the colours, shapes and sheer variety of the craft.
So when an opportunity came to work with Sizzix on quilting and patchwork dies I became very excited. For me the least exciting part of patchwork was always the cutting out - and now with the dies, Big Shot and Big Shot Pro I enjoy it. It  means that I can make lots more things and be more creative.


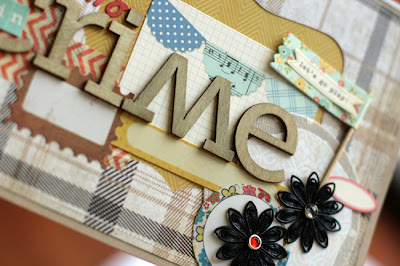
As you get to know me  you'll learn that I always have more ideas and projects on the go or in my head than I know what to do with! So I'll  be showing different projects I'm working on and things I've finished. I hope you like mt first project on this blog - it's a cover for a scrapbook, but could easily be made larger for a photo album.


It's a lovely warm  evening now - so I'm off to enjoy the sunshine.
Angela


Thursday 29 March 2012

 By Karine Cazenave-Tapie

Hello !

For these new post I would like to advance these two wonderfuls dies :) My favorites of moment : the postcard set and the mail set

If you like TRAVEL like me, you NEED to have them for sure !

I just cut and emboss them on a white paper.

And I add some colors with Adirondack ink : I used pink (watermelon), blue ( pool ) and orange (Sunshine orange)

I finish with some drops of turquoise Glimmer Glam...

I complete with stamps and picture.


I used the same techniques for others layouts.

That's all for today, see you next week !

Have a great week end!

Karine

Tuesday 27 March 2012

Create a window into a layout

 By Celine  Navarro


Hey there dear Sizzix lovers!


Have you ever thought about making windows into your layouts, using your Big Shot and your favorite Movers & Shapers dies?


On this layout, I cut a piece of patterned paper size 6x12" (the perfect size that goes through your Big Shot).


I then placed my piece of paper on top of my Ornamental Movers & Shapers and ran it into my Big Shot.


Then, glue your piece of paper on TOP of another patterned paper - choose one that really contrasts from your cut paper, so that the color pops out from the window!


Have fun
Céline

Smash book project

 By Paula Pascual 


One of this year long projects is for me to make a smash book about all the places I go to, even places like the village next to us. As much as I love scrapbooking and mini albums, I always seem to forget to really forget to document what I do. Usually I keep my layouts design based so I really fancied doing something that really keeps my memories first and my design/crafting elements are secondary. Still, I love to create and design so that will still be fairly important!


So today I will share the inside title page.
I die cut the Numbers, Vintage lace and Hearts using papers from the Basic Grey Out of Print collection.


 My first thoughts were to make it rather clean looking, but then I decided to have fun with this one page since I did not have many photos or memorabilia to incorporate. So, I decided on hand stamp without an acrylic block this large unmounted stamp from Hero Arts. The writing pattern goes well with the papers that I selected for the die cuts.


 This is a small trick that I use all the time for positioning. Very often (if not always) I lay elements together and only at the very last moment I start gluing them. That means that I have to lift some elements in order to glue the other layers, or to stamp anything underneath. For that I use low tack tape (not masking tape, it rips most papers) which will keep the right positioning and will make it a breeze to attach them at the end. To glue the numbers I just use small amount of PVA glue while they were on the tape and then positioned them in place and press over them. After a few minutes you can remove the low tack tape safely.


Use the left overs as mask and dab gently colour pastels - I love Pan Pastels! - or chalks -which are much less intense.
 

To add texture and a bit of sparkle, I glittered the first 2 using StarDust Stickles. Then I added the photo.


I finally added the subtitle - Olympic Year, cut with the Inside Out alphabet. Last thing, make sure that you seal the pastels with a sealant, I love DecoArt Matt Acrylic Sealant spray.

Hopefully along the following months I will be able to share the pages that I am doing. Wish me luck!

Monday 26 March 2012

window travel journal and card

 By Loredana Bucaria


Hello everyone, 
how are you? It's finally spring and I am so happy, I feel full of energies even though I hurt my back.. not a lovely experience.. LOL

Today I want to show you a lovely project: a travel journal and a card coordinated.
I've just prepared them to make a gift to two of my lovely friends that will be with me in a new wonderful adventure :) I'm going to Paris this week end to teach four workshops and I know that it will be an amazing travel together with my friends.
This travel journal is made with the heart for them and my intention is to let they scrap during our trip, annoying moments, saving memories:)


Materials you need:
  • Big shot
  • framelits rectangles (item code 657908)
  • framelits scallop rectangles (item code 657905)
  • card stock paper of your choice (I chose white, turquoise and mustard)
  • twine
  • stickers letters from american crafts
  • stamp noteworthy from catlife press
  • cork hearts
  • tiny letter stickers from making memories
  • sewing machine
  • 3d double side tape
  • glue or double side tape
It's a very simple project :)
This mini is a big rectangle of paper, size 22x28 cm fold in a half. Inside a lot of different sizes of pages simply sewn together in their center, one inside the other.

The feature is the lovely window created with the scallop rectangles framelits.
This kind of frame is perfect to create a sort of label for your mini albums. I cut it in the top center of the front cover of my journal and behind it I sticked a rectangle of paper with 3d double side tape.


The same process for the journal and the card, I only mixed the colors, added twine, strass, tiny letters and sewing touches:)


What do you think? Thousand of ways to use framelits dies and have fun!!!
Will my friends like this gift?

Have a wonderful monday!
Love, Lory

Friday 23 March 2012

Messy but sweet

 By Anna Dąbrowska


Hi again! i hope you all have a great creative time! I surey had a wonderful time with new Tim Holtz Decorative Strip Die, the one with Harlequin pattern: 657825 - Sizzix Sizzlits Decorative Strip Die - Harlequin Border. I love the design of this strip - it goes perfectly both with grungy and artsy projects - and you can cut it into pieces, smaller strips, tear it, crumple...or use it both as a mask and important part of composition - just like I did here:


You can see harlequin strips peeking here and there  - there is a lot of layers on this page! The other important element is black masking done with the same harlequin strips... here is how I did it:


First I took strips of different patterned papers from "Songbird" collection from Prima Marketing and the Decorative strip mentioned above.


As you see I cut out a lot of strips for this project - I knew I want to tear them into pieces and they may get damaged during the masking process too.


Using sprays, paint and stains (mostly Ranger products - from the Distress collection) I made my messy, watercolor background. I used the heating tool to have it dry perfectly. Then I could start my masking: using ink blending tool, Distress Ink - Black Soot and Decorative strips I added pattern in the 3 selected areas of my project. I made sure it was dry again.


Finally I added many smaller harlequin strips to repeat the pattern not only in the background but also in the layers of my  paper. This made a perfect match to the masking - and gave pretty shapes surrounding the photo. These strips simply can't be boring!


Finally I had everything ready: colorful, messy project with interesting elements:


I hope you liked the idea of using the Harlequin decorative strip this way. If you don't want to damage your paper during masking process you can make a "reusable mask" for yourselves using the selected strip die and a piece of very thin acrylic - just like the one you usually have in your acrylic stamps packaging. They will be easy and fun to work with and possible to clean with baby wipes or water. How cool is that?
xoxo
Finn